
|
 | |  | |
 | | - TACT GRAPH - DOCUMENTATION |

<- TACT Graph
GETTING STARTED
To use TACT’s Optional WORDLINK system, use selection I for Company Files on the TACT Main Menu, then E to Update Company Info and the D for Documents.
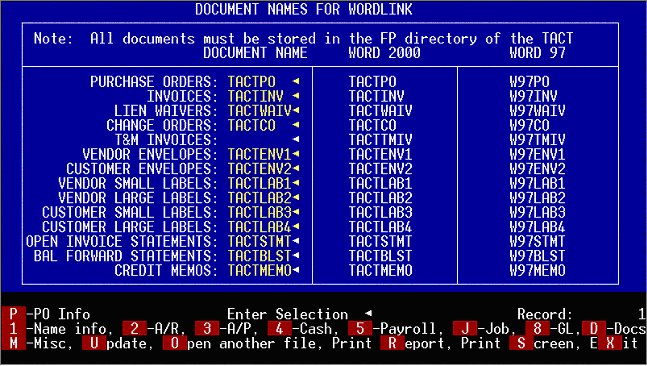
Fill in the document name that you wish to use for each of the WordLink options. The documents that are provided from TACTWORKS are shown on the right. If you do NOT wish to use one of the WordLink features, just leave that document name blank. Choose the proper document names for the version of WORD that you are using.
NOTE: You must enter a document name in order to use that feature, even if you are using the TACT default documents.
As part of the installation of WordLink, we will help you to edit your C:\TACT.BAT file to include the setting of an environment variable that points to the path you use for Microsoft Word. Also, the Macro Security level in Microsoft Word must be set to Medium in order to use the macros provided with the WordLink documents.
Important note: You cannot use a quote (? in any data that will be used with WordLink. The merge files that are created are ASCII delimited files, which use quotes to separate fields. If your data contains a quote, you will get an error when you try to use WordLink telling you that it cannot find the Source File. If you get this error, update and remove any quotes in your data and do the WordLink function again.
DESIGNING YOUR OWN DOCUMENTS
You may use Microsoft Word to design your own documents for use with WordLink. The best way to do this is to save the document that was provided by TACTWORKS into a new document. Do the WordLink function for the document that you wish to change. When WORD opens, chose Enable Macros. Then cancel out of whatever function you are left in until you see the original document with the merge fields in it (not the one with the data in it). Then choose FILE, then SAVE AS and enter a name that is 8 or less characters long. Do not change the folder, the new document must be saved in the FP folder.
When you copy the document, the Merge information is also copied so you have access to all of the merge fields if you wish to move them around.
There is a macro called FPMACRO that runs with each document in order to do the merge of the TACT data. That macro is also copied when you save the document as a new name. There is no need to modify the macro.
You can make any changes you like to your new document - different fonts, move the data around on the page, add boxes, whatever you like as long as you use all of the merge fields shown on the original document. Some fields may be left off if you prefer not to show them as long as they do not affect the dollar amounts shown. You may also add your logo to your new document if you have an electronic copy of it. You can leave out the company name and address information and replace them with your logo or letterhead information.
Once you have created a new document, go to the Company Files Menu, Update Company Info and select D for Documents. Enter in the new document name as needed.
NOTE: TACTWORKS does not support WORD. We cannot provide help in creating or editing your new documents, that is up to you or to someone you hire to help you.
POSSIBLE ERROR MESSAGES
If, when merging into WORD, you are presented with a File Conversion window, just click OK.
If you receive the message that WORD could not spell check the complete document, just click OK.
If the data doesn’t automatically merge into the document because of settings you may have in Word, simply choose TOOLS, then MAIL MERGE and the MERGE. At that point you can choose to merge to a file or to the printer.
If WORD says it cannot find the source file, it is most likely because you have used a quote (? in your data. Update the item and remove the quotes and try WordLink again.
USING WORDLINK WITH PURCHASE ORDERS
If you have entered a document name in the Company Files for Purchase Orders, the WORDLINK features will go into affect.
WHILE ENTERING PO’S
When choosing I for Print when looking at a PO, you will now have the option to View, Print or WordLink. If you choose WordLink, WORDLINK will do the following:
1.Create a merge file with the PO information in it (C:\PO.TXT)
2.Open WORD with the document name you have specified in the Company File
3.Merge in the PO data to a new document
All you have to do is click “Enable Macros?
At this point you can save this document, print it or fax it (if you have faxing software installed and linked to Word). Since PO’s can be reprinted at any time, there is no point in saving the merged PO’s unless you are editing them in WORD. If you do save them, save them to your normal document folder, do not save them to the FP folder.
FROM THE REPORT MENU
If you have several PO’s and would like to fax them all at once, use selection A, B, E, G or H on the PO Report Menu. You will have a choice of View, Print or WordLink. Choose W and enter the selection criteria. The system will then open Word and do the 3 steps listed above.
PRINTING OR FAXING TO MULTIPLE VENORS
If you are faxing directly, you will need to choose to print to your fax printer by SECTION if the PO’s that you printed are for multiple vendors. You can print a section by entering Sx-Sy, where x and y are section numbers (each PO has a different section number), in the PAGES box after selecting FILE, PRINT in Word.
Note: Using the printer icon in Word will not give you the opportunity to specify section numbers or printer so you will most likely get all PO’s printed to your default printer.
EXITING FROM WORD
When closing out the ORIGINAL document, click NO when asked if you want to save the changes.
The following is the standard TACT Purchase Order Document ?TACTPO.DOC showing the merge fields.

USING WORDLINK WITH INVOICES
If you have entered a document name in the Company Files for Invoices, the WORDLINK features will go into affect.
WHILE ENTERING INVOICES
When choosing I for Print when looking at an Invoice, you will now have the option to View, Print or WordLink. If you choose WordLink, WORDLINK will do the following:
1.Create a merge file with the Invoice information in it (C:\INVOICE.TXT)
2.Open WORD with the document name you have specified in the Company File
3.Merge in the Invoice data
All you have to do is click “Enable Macros?
At this point you can save this document, print it or fax it (if you have faxing software installed and linked to Word). Since invoices can be reprinted at any time, there is no point in saving the merged invoices unless you are editing them in WORD. If you do save them, save them to your normal document folder, do not save them to the FP folder.
FROM THE REPORT MENU
If you have several Invoices and would like to fax them all at once, use selection F on the Receivables Report Menu. You will have a choice of View, Print or WordLink. Choose W and enter the selection criteria. The system will then open Word and do the 3 steps listed above.
PRINTING OR FAXING TO MULTIPLE CUSTOMERS
If you are faxing directly, you will need to choose to print to your fax printer by SECTION if the Invoices that you printed are for multiple customers. You can print a section by entering Sx-Sy, where x and y are section numbers (each Invoice has a different section number), in the PAGES box after selecting FILE, PRINT in Word.
Note: Using the printer icon in Word will not give you the opportunity to specify section numbers or printer so you will most likely get all Invoices printed to your default printer.
EXITING FROM WORD
When closing out the ORIGINAL document, click NO when asked if you want to save the changes.
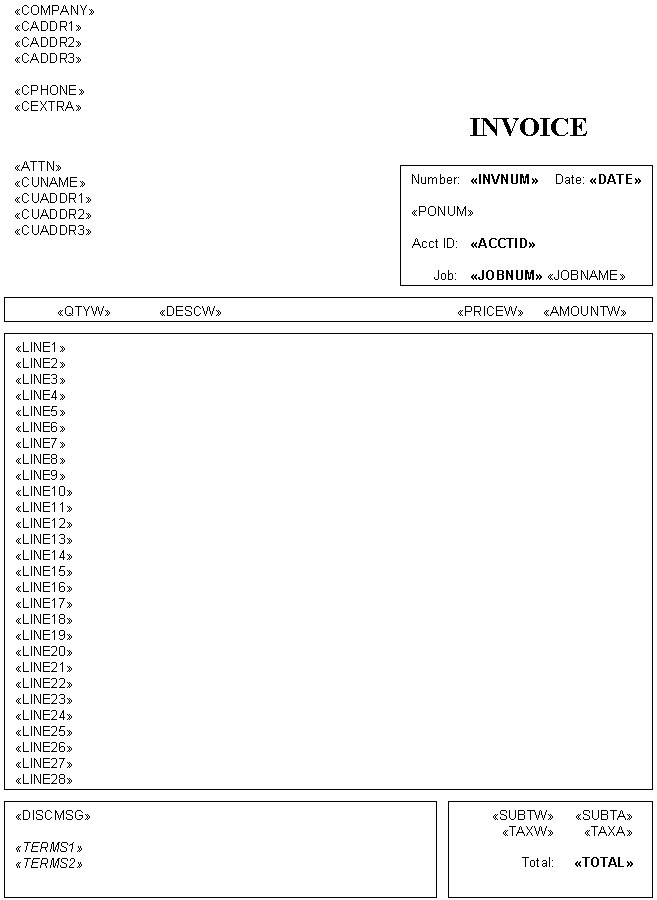
The following is the standard TACT Invoice document ?TACTINV.DOC showing the merge field names.
USING WORDLINK WITH LIEN WAIVERS
If you have entered a document name in the Company Files for Lien Waivers, the WORDLINK features will go into affect.
When choosing I for Print Subcontractor Lien Waivers from the Payables Report Menu, you will now have the option to View, Print or WordLink. If you choose WordLink, WORDLINK will do the following:
1.Create a merge file with the Lien Waiver information in it (C:\WAIVER.TXT)
2.Open WORD with the document name you have specified in the Company File
3.Merge in the Lien Waiver data into a new document.
All you have to do is click “Enable Macros? Click in the box under “FOR LABOR AND/OR MATERIALS AS FOLLOWS?and type in the text you want on the Lien Waiver.
SAVING LIEN WAIVERS
At this point you can save this document, print it or fax it (if you have faxing software installed and linked to Word). It is good practice to SAVE Lien Waiver documents in Word since TACT does not save them. Save them in your normal folder for these kinds of documents, do not save them in the FP folder.
PRINTING OR FAXING TO MULTIPLE SUBCONTRACTORS
If you are faxing the Lien Waivers directly from Word, and have multiple Lien Waivers to multiple subcontractors, you will need to choose to print to your fax printer by Section. You can print a section by entering Sx-Sy, where x and y are section numbers (each Lien Waiver has a different section number), in the PAGES box after selecting FILE, PRINT in Word.
Note: Using the printer icon in Word will not give you the opportunity to specify section numbers or printer so you will most likely get all Invoices printed to your default printer.
EXITING FROM WORD
When closing out the ORIGINAL document, click NO when asked if you want to save the changes.
The following is the standard TACT Lien Waiver document ?TACTWAIV.DOC showing the merge fields.

USING WORDLINK WITH CHANGE ORDERS
If you have entered a document name in the Company Files for AIA Change Orders, the WORDLINK features will go into affect.
When choosing K for Print AIA Change Order Form from the AIA Menu, you will now have the option to View, Print or WordLink. If you choose WordLink, WORDLINK will do the following:
1.Create a merge file with the Change Order information in it (C:\TACTCO.TXT)
2.Open WORD with the document name you have specified in the Company File
3.Merge in the Change Order data into a new document.
All you have to do is click “Enable Macros? Click in the box under “YOU ARE DIRECTED TO MAKE THE FOLLOWING CHANGES IN THIS CONTRACT:?and type in the text you want on the Change Order.
SAVING CHANGE ORDERS
At this point you can save this document, print it or fax it (if you have faxing software installed and linked to Word). It is good practice to SAVE Change Order documents in Word since TACT does not save them. Save them in your normal folder for these kinds of documents, do not save them in the FP folder.
EXITING FROM WORD
When closing out the ORIGINAL document, click NO when asked if you want to save the changes.
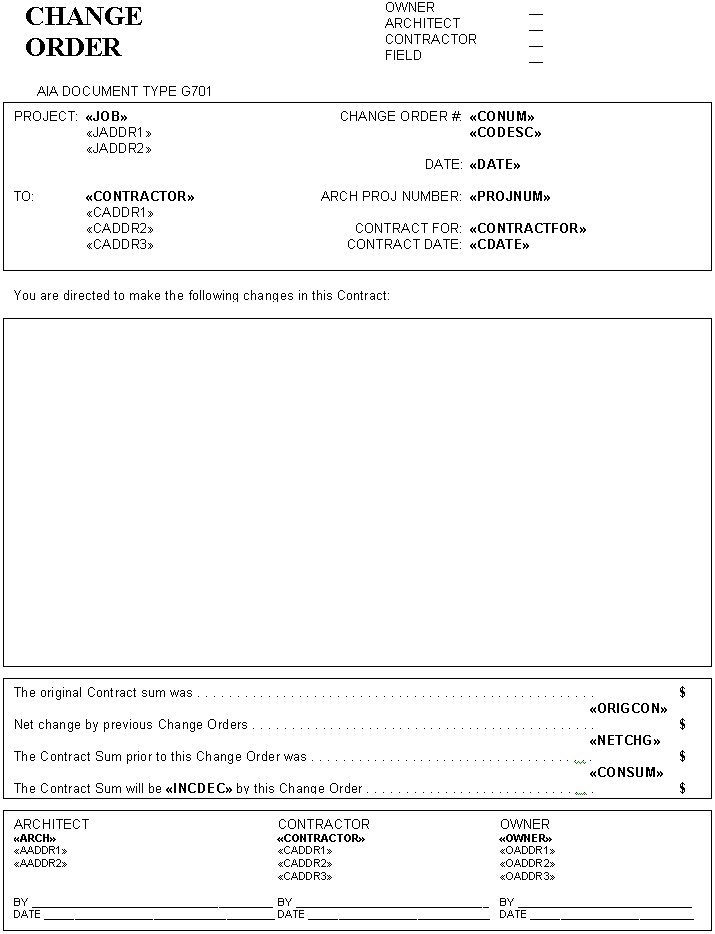
The following is the TACT standard Change Order document ?TACTCO.DOC showing the merge fields.
USING WORDLINK WITH CREDIT MEMOS
If you have entered a document name in the Company Files for Credit Memos, the WORDLINK features will go into affect.
When choosing A or B from the Credits Report Menu in A/R, you will now have the option to View, Print or WordLink. If you choose WordLink, WORDLINK will do the following:
1.Create a merge file with the Credit Memo information in it (C:\CMEMO.TXT)
2.Open WORD with the document name you have specified in the Company File
3.Merge in the Credit Memo data into a new document.
All you have to do is click “Enable Macros? Click in the Description box and type in any additional text you may want.
SAVING CREDIT MEMOS
At this point you can save this document, print it or fax it (if you have faxing software installed and linked to Word). If you have changed the description of the Credit memo and would like to save it, save it in your normal folder for these kinds of documents, do not save them in the FP folder.
EXITING FROM WORD
When closing out the ORIGINAL document, click NO when asked if you want to save the changes.
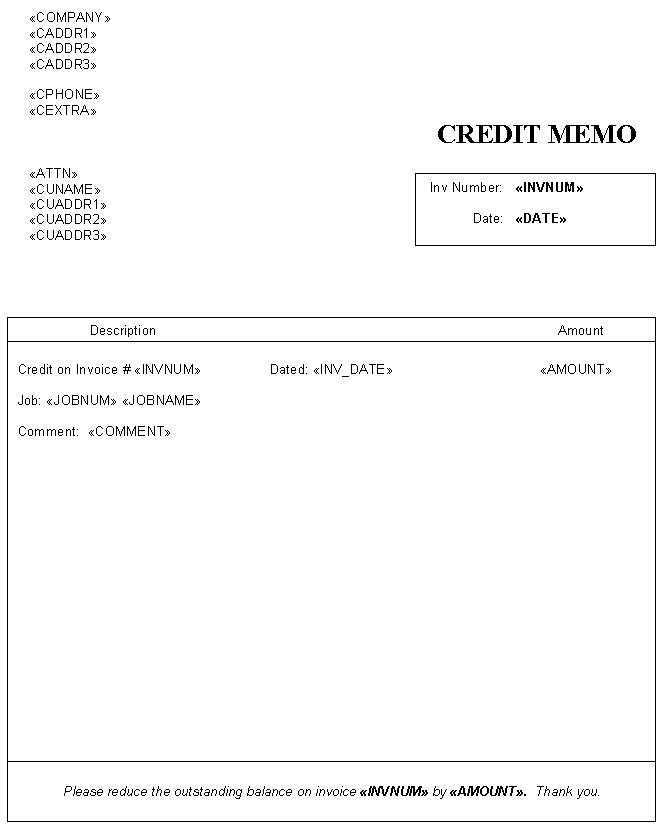
The following is the TACT standard Credit Memo document ?TACTMEMO.DOC showing the merge fields.
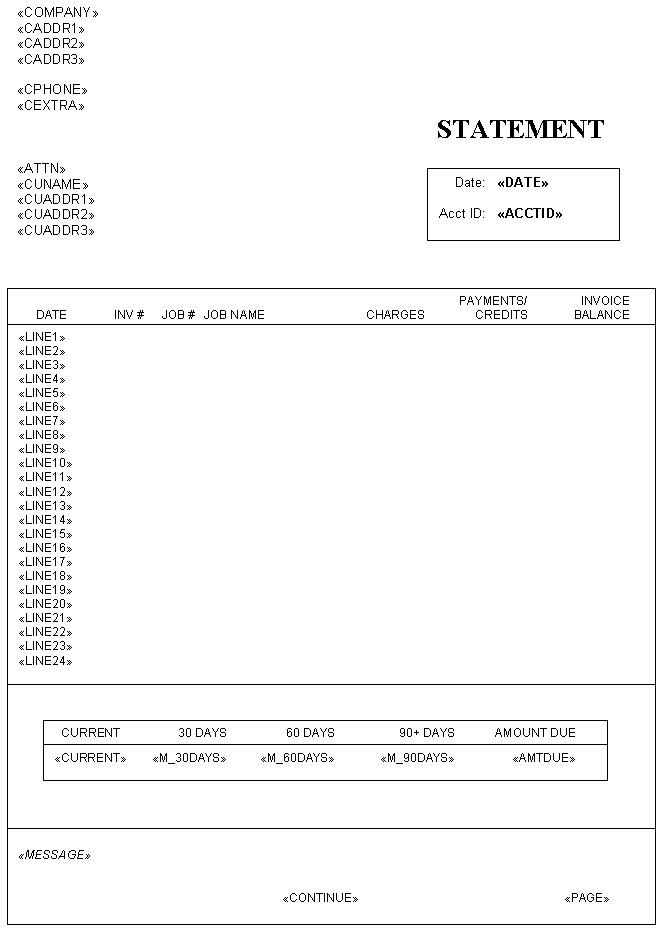
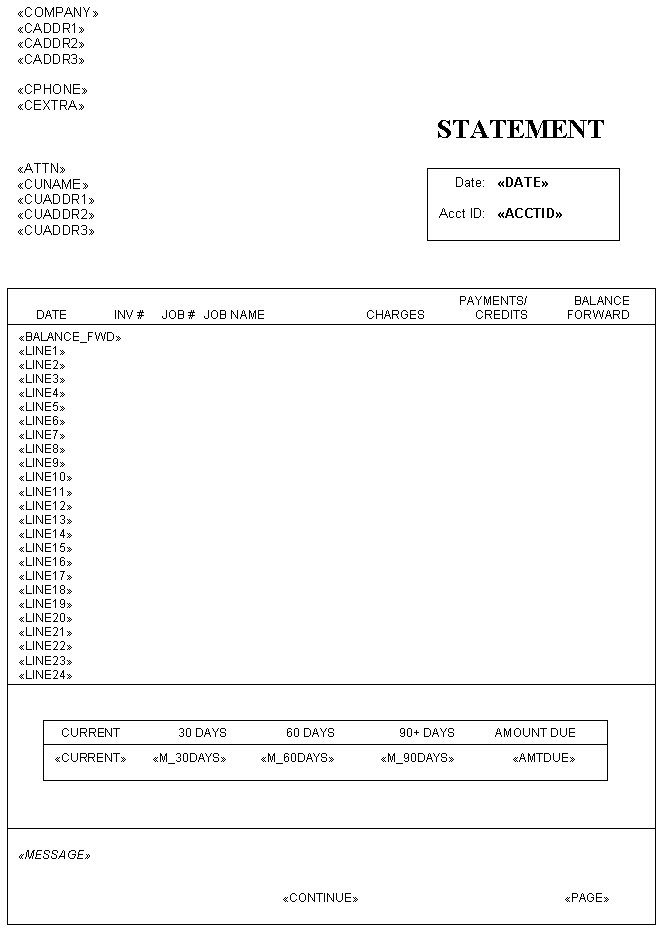
USING WORDLINK WITH STATEMENTS
If you have entered a document name in the Company Files for Balance Forward or Open Invoice Statements, the WORDLINK features will go into affect.
When choosing A, B or C from the Statements Menu in A/R, you will now have the option to View, Print or WordLink. If you choose WordLink, WORDLINK will do the following:
1.Create a merge file with the Credit Memo information in it (C:\STATEMNT.TXT)
2.Open WORD with the document name you have specified in the Company File
3.Merge in the Credit Memo data into a new document.
All you have to do is click “Enable Macros?
EXITING FROM WORD
When closing out the ORIGINAL document, click NO when asked if you want to save the changes.
The following is the TACT standard Open Invoice Statement and Balance Forward Statement documents ?TACTSTMT.DOC and TACTBLST.DOC showing the merge fields.
USING WORDLINK WITH VENDORS
ENVELOPES OR OTHER DOCUMENTS FOR ONE VENDOR
When looking at a vendor record, you can choose M for Merge. You will then receive the option of Merging to a #10 envelope or any other document that you have created. When you choose # 10 envelope, the system will do the following:
1.Create a merge file with the Vendor information in it (C:\VENDORS.TXT)
2.Open WORD with a document for a #10 envelope.
3.Merge in the Vendor data into a new document.
All you have to do is click “Enable Macros? put a #10 envelope in your printer and choose to Print.
If you choose to merge to another document, you will have to have created the document previously and stored it with an 8, or less, character name in the FP directory in the TACT folder on your server. To create the mail merge document, refer to page 7 in the Vendors/Customers section of the TACT manual for the field names of the fields in the merge file created by TACT. The name of the merge file is C:\VENDORS.TXT.
Note: TACTWORKS does not support WORD. We cannot help you with creating merge documents. Refer to your WORD documentation for creating mail merge documents. You will only need to know the name of the merge file that TACT creates. When putting the merge fields into the merge document, WORD provides you with the list of the fields that are in the file created by TACT.
LABELS FOR MANY VENDORS
When you choose selection E-Print Vendor Labels on the Vendor Report Menu, you will be given the option of Regular or Wordlink. Regular will give you the same options as without Wordlink and will allow you to print a full page of labels for one vendor if you wish. If you choose Wordlink, you will be given the option of Small (30 labels per sheet) or Large (6 labels per sheet). TACT will do the 3 steps shown above and them you will be presented with the merged label document for printing.
You may edit the large label document to add your logo or other information by editing the document TACTLAB2.DOC in the FP folder in the TACT folder on your server. You must save it again with the same name.
OTHER DOCUMENTS
You may create any documents you like in WORD using the C:\VENDORS.TXT merge document. Just use the Create Mail Merge option on the Vendor Report Menu to create the file. Then open WORD and merge in the data.
EXITING FROM WORD
When closing out the ORIGINAL document, click NO when asked if you want to save the changes.
USING WORDLINK WITH CUSTOMERS
ENVELOPES OR OTHER DOCUMENTS FOR ONE CUSTOMER
When looking at a customer record, you can choose M for Merge. You will then receive the option of Merging to a #10 envelope or any other document that you have created. When you choose # 10 envelope, the system will do the following:
1.Create a merge file with the Customer information in it (C:\CUSTOMER.TXT)
2.Open WORD with a document for a #10 envelope.
3.Merge in the Customer data into a new document.
All you have to do is click “Enable Macros? put a #10 envelope in your printer and choose to Print.
If you choose to merge to another document, you will have to have created the document previously and stored it with an 8, or less, character name in the FP directory in the TACT folder on your server. To create the mail merge document, refer to page 15 in the Vendors/Customers section of the TACT manual for the field names of the fields in the merge file created by TACT. The name of the merge file is C:\CUSTOMER.TXT.
Note: TACTWORKS does not support WORD. We cannot help you with creating merge documents. Refer to your WORD documentation for creating mail merge documents. You will only need to know the name of the merge file that TACT creates. When putting the merge fields into the merge document, WORD provides you with the list of the fields that are in the file created by TACT.
LABELS FOR MANY CUSTOMERS
When you choose selection E-Print Customer Labels on the Customer Report Menu, you will be given the option of Regular or Wordlink. Regular will give you the same options as without Wordlink and will allow you to print a full page of labels for one customer if you wish. If you choose Wordlink, you will be given the option of Small (30 labels per sheet) or Large (6 labels per sheet). TACT will do the 3 steps shown above and them you will be presented with the merged label document for printing.
You may edit the large label document to add your logo or other information by editing the document TACTLAB4.DOC in the FP folder in the TACT folder on your server. You must save it again with the same name.
OTHER DOCUMENTS
You may create any documents you like in WORD using the C:\CUSTOMER.TXT merge document. Just use the Create Mail Merge option on the Customer Report Menu to create the file. Then open WORD and merge in the data.
EXITING FROM WORD
When closing out the ORIGINAL document, click NO when asked if you want to save the changes.
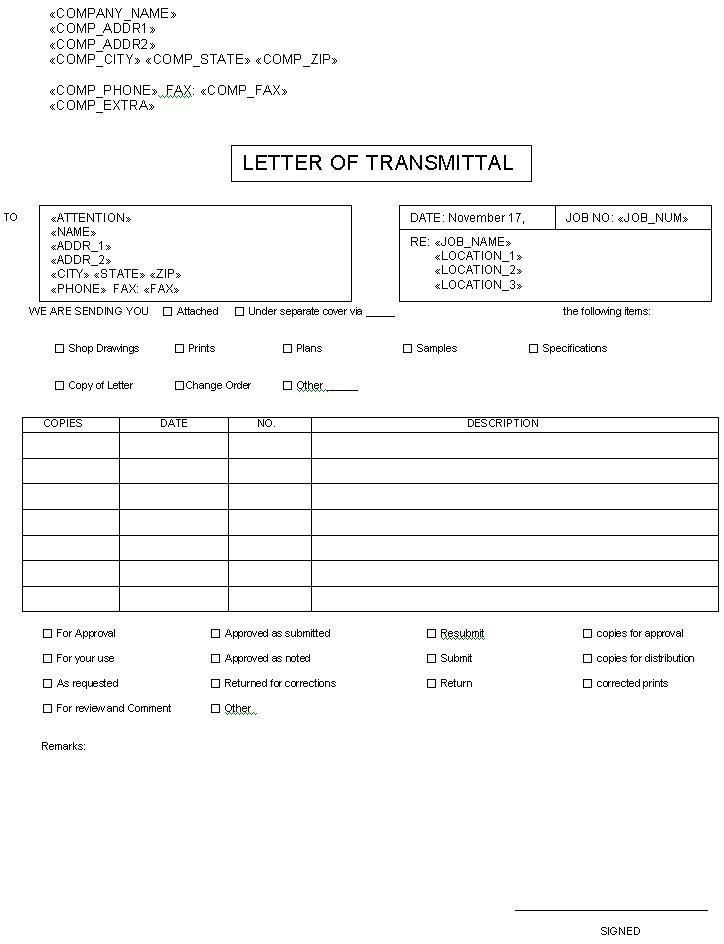
USING WORDLINK FOR TRANSMITTALS OR OTHER JOB-RELATED DOCUMENTS
TACTWORKS provides a default Transmittal form called TACTTRAN.DOC or W97TRAN.DOC. You will most likely want to save these files to another name in the FP folder and then add your logo and company information before using.
To create a merge file for job-related information, choose M on the menu when looking at the Jobcost screen.
You will be asked if you want to include Customer or Vendor information for the merge. If you answer C, the customer information will be automatically pulled from the job record. If you answer V, you will be prompted for the VENDOR ID. Note: You must know the vendor ID ahead of time, there is no Browse available.
You will then be prompted for the document name. You can use the default names or enter the name of a document that you have created and stored in the FP folder in TACT.
When you are presented with the document in Word, you will need to first choose to Merge. The default Transmittal forms supplied by TACTWORKS are Word Forms. With forms, you cannot merge to a new document, you must simply use the merge selection on your Word menu. Then, to update the form, you need to first PROTECT THE FORM. This is done by VIEW, TOOLBARS, FORMS and then clicking on the Lock Icon (furthest to the right). Now you are ready to fill in the form.
To check a box, just click on it. To fill in data, just click in the shaded area and start typing. The TAB key will also allow you to move between boxes.
When you are finished, you can print the form. If you wish to save it for your files, choose FILE, SAVE AS, and choose the proper place to save it according to your company’s procedures. DO NOT SAVE IT IN THE FP FOLDER.
When closing Word or the original document, answer N to save the changes. You do not want to change your original document.
The name of the Merge file created when doing Job-related documents is C:\JOBINFO.DOC.
The following is the TACT standard Transmittal document ?TACTTRAN.DOC showing the merge fields.
|
|
|  |  |  |  |
|
|
